Having a functioning pilot light is critical for a gas water heater to heat water properly and safely. If the pilot light goes out, it’s important to follow the correct relighting procedures to prevent any safety hazards or damage.
This article provides clear, step-by-step instructions for Gladesville residents on how to safely relight your gas water heater’s pilot light. We will cover procedures for both manual and electronic ignition systems.
Before getting started to relight pilot, we recommend locating your water heater’s manual for the manufacturer’s specific guidelines. We also advise verifying there are no gas leaks or odours, and allowing time for any gas to dissipate after turning off the gas control valve.
By correctly relighting your pilot, you can restore hot water to your home while avoiding potential plumbing emergencies. If you have any trouble getting the pilot stabilised, contact our team at 1300 349 338 or jobs@gladesvilleplumbingservice.com.au for further assistance.
Safety First: Precautions To Take Before Relighting
When relighting your water heater’s pilot light, safety should always be the top priority. Rushing through the process without taking proper precautions can lead to dangerous gas leaks or explosions.
Before attempting to relight the pilot, take the following safety measures:
- Verify there is no smell of gas near the water heater. If you detect any gas odour, immediately ventilate the area and call the gas company or emergency services.
- After turning the gas control knob/valve off, wait 5-10 minutes for any built up gas to dissipate before relighting. This allows time for the flammable gas to ventilate.
- Check surrounding areas and remove any flammable materials like clothing, cleaning solutions or cardboard. Make sure pets and children are also kept away during the relighting process.
- Review your owner’s manual to understand the proper lighting procedure for your specific unit’s ignition system (manual or electronic).
Taking a cautious, informed approach details how relight safely, ensuring restoration of your water heating without risking any dangerous gas build ups or ignition flare ups. Remember, always refer to manufacturer guidelines and contact a professional if you have any doubts or trouble getting the pilot stabilised.
Identifying Your Water Heater Type
Before attempting to relight your pilot light, it’s important to identify what type of water heater you have and understand its ignition system. There are a few key features to look for:
Manual vs Electronic Ignition
Many modern gas water heaters have electronic ignitions, while older models likely have a manual pilot light. Check for:
- An igniter button - This indicates an electronic ignition requiring the button to be pressed to activate the pilot.
- A dial or knob to control gas flow - This points to a manual pilot light needing to be lit with an external flame source.
Location of Controls
The controls to operate your heater pilot may be located in a few places:
- On the bottom panel - Many heaters have removable access panels covering the controls.
- Behind a flip door - Some units feature a locked metal cover you must open to access controls.
- On the side of the tank - Controls could be mounted externally rather than behind a panel.
Refer to your manufacturer’s guidelines on identifying controls for safely lighting your specific unit’s pilot. Our experts at Gladesville Plumbing are also happy to assist with any questions or concerns relighting your hot water system.
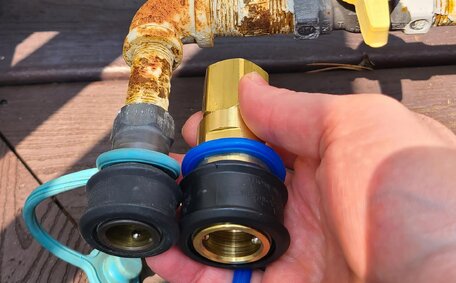
Accessing The Pilot Light Assembly
Gaining access to the pilot light assembly is an essential first step when attempting to relight your water heater’s pilot. The location and specifics will vary depending on your unit, but there are some general guidelines to follow:
- Locate the access panel, which may be on the side, bottom, or behind a flip door. Refer to "Identifying Your Water Heater Type" if needed.
- Use a Phillips or flat head screwdriver to remove any screws securing the panel in place.
- Carefully pull off the access panel, being cautious of any wires. Set it aside in a safe location.
- Check your water heater manual for the exact position of the pilot assembly, as this differs across manufacturers. It will connect to a tubing with gas input and output.
- Visually trace the pilot tubing to find the pilot hood opening where gas ignites. This is where you will introduce an external flame for manual ignition systems.
- Ensure you have ample room to crouch or lean in with both arms fully extended to comfortably access controls.
With the pilot assembly now accessible, you can proceed to light pilot following the process covered in upcoming steps. Replace any protective panels once finished for optimal safety.
Relighting The Pilot - Manual Ignition
If your water heater has a manual pilot ignition system, carefully follow these steps to light your pilot:
- Verify the gas control knob or valve is in the full OFF position. Double check by attempting to push in and turn the knob clockwise.
- Wait at least 5 minutes after shutting off the gas before relighting, allowing any built up gas to dissipate.
- Insert a long fireplace lighter or match through the pilot assembly opening to introduce an external flame near the tip of the pilot hood.
- While maintaining the external flame position, push in the gas control knob slightly and turn it counterclockwise to the PILOT setting.
- Continue holding the knob down for 30-60 seconds after confirming the pilot is lit by noting the flame remains on when removing the lighter/match.
- Slowly release the gas control knob while leaving it in PILOT. Ensure the pilot flame remains on.
- If the flame goes out, repeat steps 3-6 after waiting several minutes.
- If the pilot continues burning, turn the gas control knob further counterclockwise to the ON setting for water heating functionality.
Be sure to closely follow the lighting instructions provided in your owner’s manual as well. If you have trouble stabilising the pilot flame or keeping it lit, contact Gladesville Plumbing immediately for assistance.
Relighting With Electronic Ignition
If your gas water heater has an electronic pilot ignition, follow these steps instead to relight:
- Confirm the gas control valve or knob is turned fully OFF by attempting to push in and turn it clockwise.
- Wait at least 5 minutes to allow any accumulated gas to dissipate.
- Locate the rubber igniter button, often red or black, near the gas controls.
- Fully push in the igniter button. You should hear a clicking sound as the electronic spark attempts to light the pilot.
- Keep holding the button down for 30-60 seconds. Check for a flame through the pilot light assembly opening.
- Release the igniter button once the pilot flame remains lit after removing any external flame source.
- Set gas control knob or switch to the ON position for standard water heating functionality.
- An indicator light may glow once the pilot is on. Refer to your manual for confirmation.
If the pilot doesn’t stay lit after multiple tries, contact Gladesville Plumbing for assistance. Our experts can troubleshoot any issues getting your electronic ignition stabilised.
Troubleshooting Issues
Several common issues may arise when trying to relight your gas water heater’s pilot light. Here is some troubleshooting guidance on notices to make and potential solutions:
Pilot Won’t Stay Lit
If the pilot flame initially ignites but does not remain on after removing the lighter/match or releasing the igniter button, there could be a few causes:
- Strong drafts around the water heater blowing out the flame - Shield or relocate air flow.
- Pilot tube clogged with debris - Attempt cleaning following your manual guidelines.
- Weak gas flow unable to sustain the flame - Check gas line filters and pressure.
No Gas Flow At All
If no gas appears to be emitted when operating the gas control valve and attempting ignition, potential issues include:
- Gas line shutoff valve closed - Verify shutoff valves from metre are open.
- Control knob defective - Attempt replacing control valve knob.
- Thermocouple failure - Pilot won’t emit gas requiring thermocouple replacement.
Igniter Button Not Sparking
For electronic ignitions, if pushing the igniter results in no clicking or sparking noise, the button itself likely needs replacing. Contact Gladesville Plumbing to schedule a service call.
For persistent pilot light troubles or complex repairs, our licenced experts are ready to help diagnose issues and restore hot water to your home. Contact Gladesville Plumbing at 1300 349 338 for further troubleshooting assistance.
When To Call A Professional
While relighting your gas water heater’s pilot light is often a straightforward DIY task, there are certain situations where it’s essential to call a professional for assistance:
If you have followed all lighting instructions but are unable to get the pilot stabilised for more than a few seconds, this likely indicates an underlying issue needing professional attention. Persistent pilot outages can suggest problems with gas flow, ventilation or component faults.
Suspected Gas Leaks
If you smell gas before, during or after the relighting process, immediately shut off the gas line and dial emergency services. Never ignore the scent of gas, as this can precede fires, explosions and carbon monoxide poisoning.
Unsure About Any Steps
If the provided directions seem unclear or you don’t feel fully comfortable accessing controls or introducing external flames, it’s better to call for help rather than risk mistakes. Don’t rush through steps you’re uncertain of.
For reliable assistance relighting your water heater’s pilot or diagnosing repair issues, contact the licenced pros at Gladesville Plumbing on 1300 349 338 or jobs@gladesvilleplumbingservice.com.au. Our experienced, local technicians serve Gladesville residences 24/7.